Thanksgiving
My Thanksgiving Unit usually took 3 days.
 Thankfulness
Day 1
Materials
- lots of 4×4 squares cut out of construction paper
- crayons
- Thanksgiving Is For Giving Thanks
Procedure
- read
- read
- make a class list of things that the students are thankful for
- model drawing and labeling one thing from the list on a colored construction paper square
- pass out a square to each child and have them do the same, have them put their name on the back
- pass out another square and instruct the children do pick another thing on the list
- collect all the squares and make a class quilt
- read
[amazon_enhanced asin=”0060510986″ /] [amazon_enhanced asin=”0448422867″ /]
Other wonderful Thanksgiving books:
[amazon_enhanced asin=”0448425297″ /] [amazon_enhanced asin=”0843125705″ /] [amazon_enhanced asin=”0824918266″ /]
[amazon_enhanced asin=”0439669375″ /] [amazon_enhanced asin=”0439105668″ /] [amazon_enhanced asin=”0310711622″ /]
[amazon_enhanced asin=”0439459486″ /] [amazon_enhanced asin=”0843114169″ /] [amazon_enhanced asin=”0140565957″ /]
[amazon_enhanced asin=”0823419797″ /] [amazon_enhanced asin=”0807578177″ /]
Thanksgiving
Day 2
 Materials
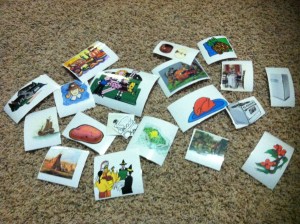
- clip art pictures
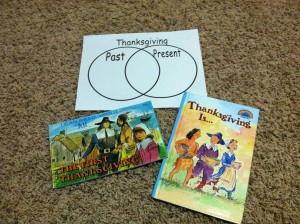
- Venn Diagram worksheet
- crayons
- pencils
Procedure
- read
- talk about the difference between the first Thanksgiving and Thanksgiving as we know it
- have the diagram out and discuss the sections of the diagram, see if the students can come up with what the middle section is all by themselves
- show the clip art cards one at a time and discuss which section of the diagram it goes in and then place it there accordingly
- have the students go to their seats (leave the diagram up)
- model completing the worksheet by drawing and labeling at least one thing in each section
- pass out the worksheets for the students to complete
- read
[amazon_enhanced asin=”0590331280″ /] [amazon_enhanced asin=”0823419797″ /] [amazon_enhanced asin=”B000Q4A1RM” /]
Indian Art
Day 3
Materials
- brown circles traced on construction paper (1/child)
- red, green, orange, purple, yellow strips 8×4 (1 strip of each color/child)
- blue strip 6×3 (1/child)
- markers
- glue
- scissors
Procedure
- read
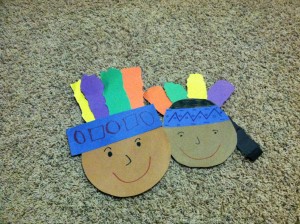
- show model Indian
- model cutting out the circle
- pass out materials and have the children do the same
- model taking on strip of colored paper and tearing around the edge to make it look like a feather and glue to the back of the circle
- pass out materials and have the children do the same
- model drawing a pattern on a blue strip and gluing to the front of the circle
- pass out materials and have the children do the same
- model drawing eyes, eyebrows, nose, & mouth
- have the children do the same
- have the children write their name on the back and set them aside to dry
[amazon_enhanced asin=”0545053722″ /] [amazon_enhanced asin=”0811467104″ /]


-
-
4 years
Tagged books, reading, teaching